

Before starting any building or woodworking project you should be aware that the quality of your lumber matters more than you might think. How wood preparation is carried out in your projects determines whether your handicrafts or dream home will succeed or fail. Inadequate wooden material preparation leads to costly delays alongside material waste and weak construction elements. This blog will present every vital step in adequate timber preparation starting from the sawmill and ending with final touches. Watch this space to find out how to maximize the use of your timber and set up your project for success!
Why Lumber Preparation Is Critical
When it comes to building, crafting or designing with wood, one thing is crystal clear: lumber preparation is the foundation of a successful project. Preparing every wooden piece extends beyond basic logging procedures because it determines the material’s readiness for specific residential or commercial applications. Proper lumber preparation delivers structural performance with extended durability and visually pleasing design attributes that upgrade the completed project.
The Risks of Poor Lumber Preparation
Imagine this, You’ve spent time planning your project, selected the perfect design and started bringing it to life. However, poor lumber preparation leads to materials that eventually warp or crack. The result? This situation results from the undesirable combination of time wastage, money loss and extensive frustration. Improper wood seasoning or processing methods result in up to 20% of waste due to damage such as warping or cracking. Faulty lumber causes more than typical inconvenience because it will destroy both your project schedule and financial plan.
How the Wood Manufacturing Industry Plays a Role
Lumber preparation for utilization is primarily the responsibility of the wood manufacturing sector. Wood production is more enhanced than tree felling and timber sales. Industry processes work in the background to check lumber materials for compliance with moisture standards along with strength requirements and final finishing quality. What results from skipping procedures or hurried processes typically leads to destructive outcomes. A mishandled wood preparation process regardless of hardwood or softwood types will degrade the final product quality.
The Ripple Effect on Your Project
Proper lumber preparation doesn’t just affect the quality of the wood because it has a ripple effect on your entire project. For example, Your house construction estimate faces substantial change based on how accurately you prepare the wood materials. The project costs rely directly on material quality and efficient usage. Building standards in Washington remain high thus proper lumber preparation is the deciding factor for project budgets. Because it determines whether construction costs will stay within limits or escalate due to unwanted structural problems and material waste. Therefore, begin your hammer work only after ensuring your lumber materials are ready.
This blog will explain the extensive lumber preparation journey and its significant steps. Here’s what you’ll learn:
- The essential steps of lumber preparation from log selection to defect inspection.
- How sawmill operations turn raw logs into usable lumber.
- The role of kiln drying and wood seasoning is to ensure durability and prevent issues like warping.
- The importance of proper grading and inspection for quality control.
Step-by-Step Breakdown of the Lumber Preparation Process
Every wood-based project depends on a successful lumber preparation process for its foundation. It’s a journey that transforms raw, rough logs into high-quality, ready-to-use lumber. Wood-based project success depends on efficient lumber preparation as its fundamental operational method. This transformation process uses raw, harsh logs to create final ready-to-use wood items. Each stage of lumber preparation guarantees the wood reaches optimal strength and stability to fulfill whatever task it will serve for building construction, furniture or hand-made creations. The following essential steps form a foundation determining how well your upcoming project turns out.
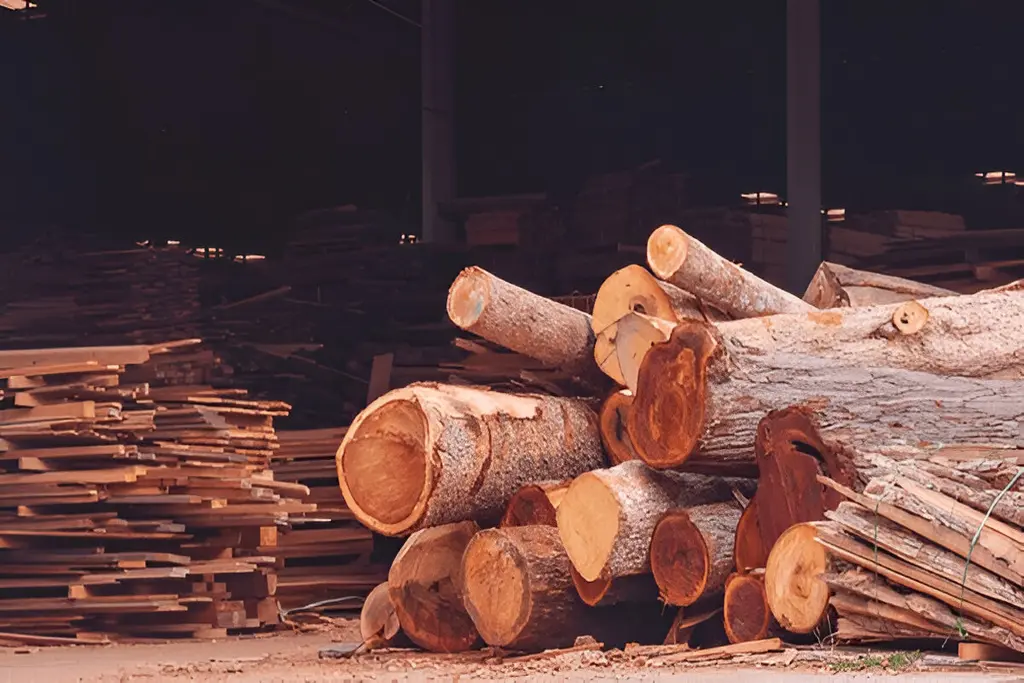
Log Selection and Grading: The Foundation of Quality
It all begins with choosing the proper logs. Imagine a master chef selecting the finest ingredients. This is the same concept for lumber. The selection process of logs remains essential because it determines which wood will yield optimal quality. Trees with straight shapes without defects will transform into top-quality boards. Log assessment through grading happens next to assess their fitness suitability by examining the appearance and structural quality. A defective initial foundation causes even excellent design concepts to fail and that’s why this first step is vital.
Debarking and Sawing Where Turning Logs Into Lumber
The outer bark will be removed once the logs are selected and graded. Debarking functions as more than a cleaning method because it makes certain wood completely free of contamination from potential insects or mold. Next, The logs proceed to the sawmill installation for conversion into usable lumber. Modern Sawmill equipment today functions like computerized board production systems that yield 95% usable wood material from each log. By minimizing waste throughout the process the cost-effectiveness and efficiency of log utilization are improved.
Drying and Seasoning The Secret to Strength and Stability
Freshly cut wood is packed with moisture and, unless properly dried, could crack, warp or even rot. That’s where the lumber drying process comes in. Through kiln drying, your lumber will dry in 7–10 days using 1-inch thick wood pieces. Kiln-drying lumber makes wood dry evenly throughout, allowing it to maintain strength and achieve increased stability. The necessary drying process protects lumber from dangerous deformation and cracking which reduces project timelines and causes material damage while making it suitable for intended usage.
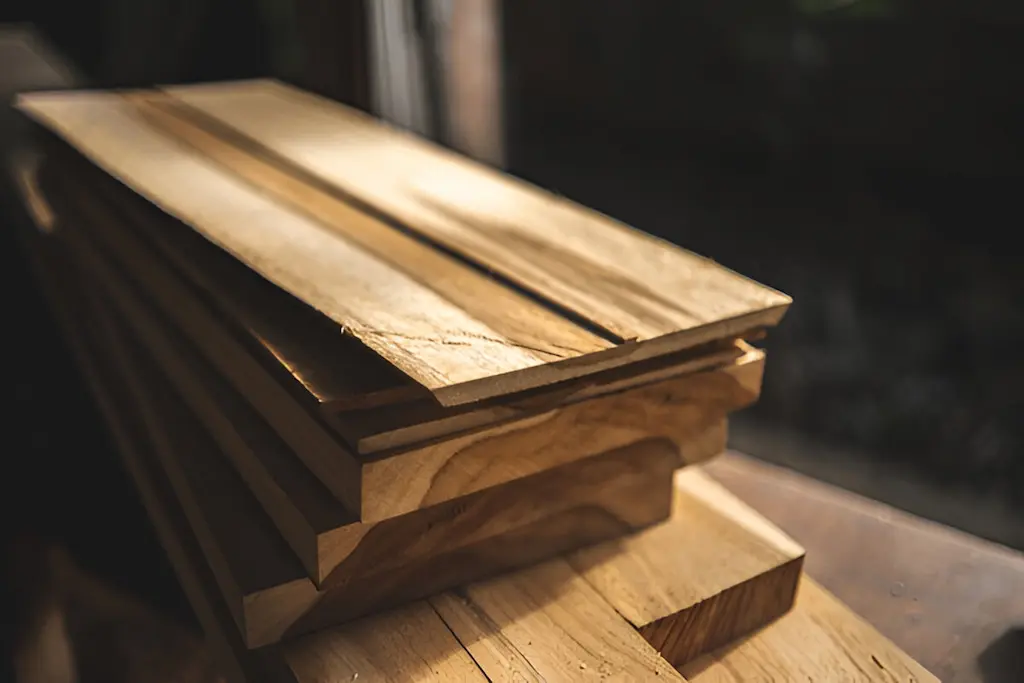
Planning and Surfacing is Achieving That Perfect Finish
The drying process completes its mission after which the surface needs to be evenly leveled. Planning and surfacing are where the magic happens. During this phase your lumber receives its elegant veneer to elevate its quality to top-grade furniture. Using planers and jointers provides a consistent thickness while developing flat surfaces on all boards. Woodworking projects benefit from lumber made flat during the final preparation steps since smooth boards create superior-quality products. A perfectly surfaced board makes it simpler to apply finishes and stains, resulting in a professional appearance.
Defect Inspection and Grading: Ensuring Perfection
Finally, Every single piece of timber undergoes comprehensive defect examination as the final processing step. Wonderful wood types can secretly contain structural-deteriorating cracks in addition to hidden knots. The defect inspection and grading procedure verifies the selection of flawless and quality-high lumber for future use. Lumber quality control takes place to select the highest-quality materials available to customers. Critical construction success depends on confidence that every wooden piece will remain under strain.
Pro Tip: Lumber Estimation Services experts will simplify your purchasing process while delivering precise materials widths along with quantity checks to reach your expected specifications.
The lumber preparation steps lead directly to wood materials that stand strong and stable for future use. Successful production of custom furniture and large construction requires proper execution of these steps which ensures you will save time and money and decrease frustration in the future. Your project is now set to advance to superior levels. Your lumber needs preparation work before it can perform at its best.
Lumber Preparation Stages and Their Impact on Construction Quality
| Stage of Lumber Preparation | Key Actions Involved | Tools/Processes Used | SEO Keywords Covered | Impact on Project Quality |
| Log Selection | Choosing straight, defect-free logs | Visual grading, sourcing | Lumber preparation, wood manufacturing industry | Determines wood usability and minimizes waste |
| Sawmilling | Cutting logs into boards | Circular/vertical saws | Sawmill process, converting logs to lumber | Impacts board sizes, accuracy, and structure |
| Kiln Drying | Moisture removal | Kilns, moisture meters | Kiln drying lumber, lumber drying process | Prevents warping cracking, improves bonding |
| Surface Planing & Jointing | Smoothing and squaring | Planer, jointer | Lumber processing steps, wood preparation before use | Ensures uniform dimensions and better finishes |
| Wood Seasoning | Stabilizing moisture content | Kiln or air-drying | Seasoning of wood before use, wood seasoning techniques | Enhances structural stability |
| Final Inspection & Grading | Quality control check | Defect scanners, manual grading | Steps of lumber preparation, wood preparation before use | Guarantees material quality for end-use |
Deep Dive into the Sawmill Process
Through its transformative process, the sawmill operation transforms unprocessed logs into usable wood products. This is the heart of lumber production where logs undergo a series of transformations that shape them into the boards you’ll use for your next project. This blog explores lumber production through the complete sawmill process and its fundamental role in generating high-quality outcomes.
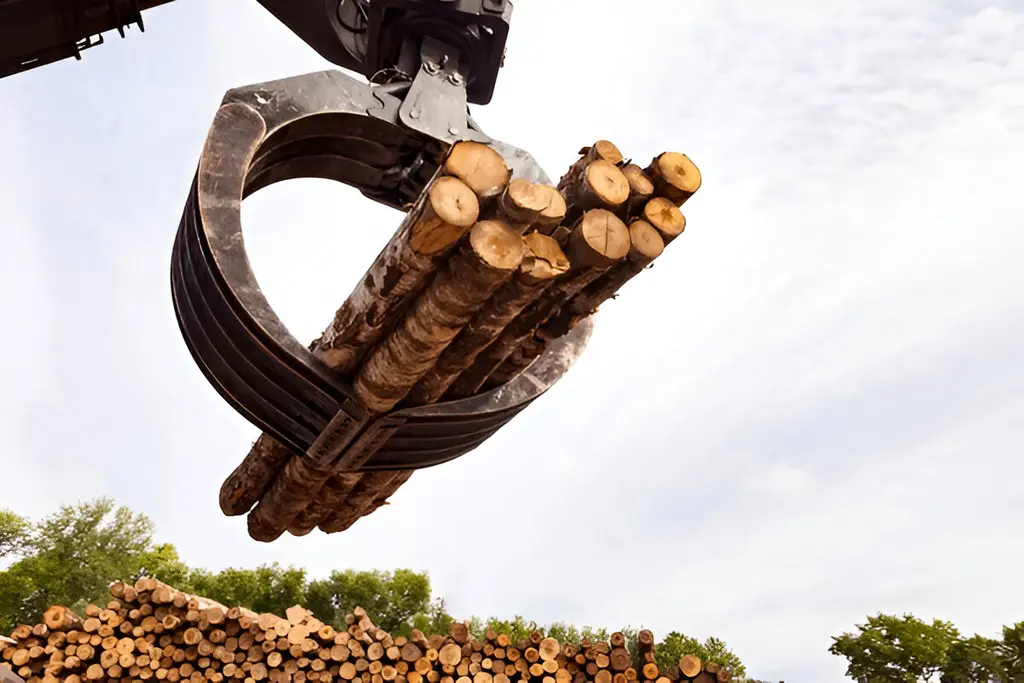
Transporting and Debarking Where Preparing the Logs
The start of wood transformation occurs at the end of harvesting operations. Special vehicles move these substantial timber pieces toward sawmills after they are brought by trucks that handle heavy-load transportation. During debarking operations at the facility the logs go through procedures that exercise more than bark removal alone. This processing approach removes bark alongside everything from soil and other materials that may damage the quality of the wood material. Wood debarking is essential for maintaining clear and pest-free wood pieces until the process continues.
Sawmilling: Turning Logs into Usable Lumber
The procedure for sawmill operation starts when debarking is complete. The actual change takes place during this stage. Long wood pieces enter sawmill machines, where their path is split by huge blade tools. Building projects dictate the dimensions the sawmill machines must produce from original logs. The sawmill produces precise cuts of logs that transform them into various lumber sizes ranging from structural beams to plain timber planks.
Modern sawmills are incredibly efficient and can convert up to 95% of a log into usable lumber. Manufacturing efficiency reaches nearly 95% so each log contributes value to the final products thus creating economic savings while protecting the environment.
Automation: The Future of Sawmilling Efficiency
Gone are the days of manually cutting and measuring each log. Today, sawmill automation is taking the industry by storm. Automation controls all aspects from cutting through sorting which results in faster and more precise manufacturing process operation. Modern sawmills profit from robotic arms, laser scanners and automatic saws to achieve both heightened speed and excellent precision. Efficiency elevation happens through automation which leads to reduced staff costs and higher manufacturing numbers. As a result, Sawmill operations now create greater production volumes within diminished periods thus benefiting both industrial producers and final customers.
The Importance of Precision in Sawmilling
Every step of the sawmill process is about precision. During log processing operators aim to produce dimensional boards that will proceed toward later preparation steps. Minor cutting errors will lead to material losses, incomplete final products and delivery delays. Advanced sawmills implement computerized control systems and laser guidance to achieve the best final results in their manufactured products. The result? The outcome produces durable lumber which maintains reliability against long-term project use.
Efficient Sawmilling in Action
Cutting-edge construction projects depend heavily on modern sawmilling technology that delivers the most efficient production methods. The leading construction companies in Dubai leverage their advanced sawmill systems to secure premium wood products delivered quickly for their projects. Sawmill operations determine project success because they provide speed and precision during the execution of skyscraper and luxury home construction.
The complete sawmill process incorporating log transport debarking and precise lumber cutting reveals advanced wood manufacturing skills that result in the wood products you utilize. Additionally, Modern wood processing automation makes this procedure faster than ever while producing high-quality final products that minimize unnecessary material waste. Using lumber that experts prepare for your project allows you to begin your work with optimal success.
Understanding Kiln Drying and Wood Seasoning
The fundamental process of wood preparation mandates absolute drying completion of wood materials. Proper wood drying maintains its structural stability by preventing damaging changes that result in damage and unsightliness to your finished project. The combination of kiln drying and wood seasoning functions as essential techniques ensuring wood stability and durability for use readiness. Now let’s break down these processes and find how they keep your wood at its best.

Air Drying vs. Kiln Drying
Before specific explanations, you need to grasp air drying methods compared to kiln drying techniques. The natural air drying method involves stacking wood in any well-ventilated setting, so it takes several months to complete the drying process. This drying approach produces adequate results but maintains a considerably slow pace, producing inconsistent drying patterns that create potential wooden material defects.
On the other hand, Lumber kiln drying operates through a distinct method that delivers faster and more controlled control procedures. The heated chamber controls specific airflow conditions and precise temperature and humidity levels for drying wood. Because of proper temperature control, wood acquires even drying characteristics through this method. The kiln drying procedure requires about 7-10 days for 1-inch thick boards through a system that provides fast drying and increased uniformity.
| Feature | Air Drying | Kiln Drying |
| Drying Method | Natural evaporation of moisture | Controlled heating inside a kiln chamber |
| Time Required | Several months to over a year | 7 to 10 days for 1-inch thick lumber |
| Moisture Content Achieved | 12%–20% (depends on climate) | 6%–8% (ideal for furniture and indoor use) |
| Cost | Lower (minimal equipment needed) | Higher (energy and setup costs involved) |
| Control Over Drying | Less control; dependent on weather conditions | Precise control of temperature, humidity, airflow |
| Risk of Defects | Higher risk of warping, cracking, and staining | Lower risk; defects minimized with careful control |
| Suitability | Outdoor projects, rustic structures | Indoor furniture, cabinetry, construction lumber |
| SEO Keywords Used | Drying wood for construction, Wood seasoning | Kiln drying lumber, Lumber drying process |
The Stages of Kiln Drying: Getting It Just Right
The multiple stages of kiln drying serve dual purposes to correctly dry wood to its optimal moisture content level. Here are the key stages:
Initial Heating
The first stage involves raising the temperature inside the kiln. These temperatures create conditions that force wood moisture to start evaporating. This quick drying process becomes possible in this vital stage because it operates faster than conventional air drying.
Conditioning
During equalizing the drying process, wood moisture content reaches its target dryness levels as part of the kiln drying process. This step is necessary to ensure wood readiness for use because it eliminates the possibility of dimensional changes.
Equalizing
The final stage of kiln drying is equalizing, where the moisture content stabilizes and the wood reaches the desired levels of dryness. This step ensures that your wood is ready for use without the risk of future deformation.
Wood Seasoning: Achieving Optimal Moisture Content
Proper wood seasoning is essential for achieving functional and lasting lumber. Almost every wooden product requires proper seasoning which transforms wood through controlled drying to achieve its specific moisture content marking its final functional status. The optimal wood moisture content for interior purposes should stay between 6–8%. This range keeps the wood stable and prevents dimensional changes. While outdoor applications require wood with 9–14% moisture content since exposure to elements must be considered.
Wood that undergoes adequate drying becomes more manageable during processing and finishing work. The right moisture content in timber enables consistent and uniform finish absorption, resulting in a refined appearance during staining, sealing and painting operations.
How Is Lumber Processed for Construction and Furniture?
Converting rough-cut lumber into usable planks for construction requires complete knowledge from woodworkers who work on furniture projects or construction sites. The production method shapes all essential characteristics of the finished product including its appearance, mechanical properties and operational capabilities. This blog examines lumber processing starting from raw wood material handling and finishing with quality control assessments for softwood and hardwood materials.
From Rough Cuts to Useable Lumber
The lumber processing route starts right after the sawmill releases the materials. It starts with transforming rough-cut boards into sizes that serve better purposes after logs become boards through the sawmill process. The basic lumber processing methods stay consistent while the procedures experience slight variations. It depends on whether the timber comes from softwood groups with pine or fir trees or hardwood species such as oak or maple.
Builders who use softwood normally transform its boards into substantial planks and beams for construction purposes. The manufacturing of hardwood results in smaller dimensional items used to produce furniture since tight measurements and a professional appearance matter for these applications. The processing methods are identical for both types of wood. Still, hardwoods need increased attention due to their dense structure and their requirement for higher-quality finishing.
Shaping the Lumber with Planning and Cutting
Wood products are suitable for planning after drying because they are ready for cutting to the preferred sizes. The wood moves through processing machines to achieve smooth surfaces and eliminate imperfections while equaling the timber dimensions. The goal is to make each board identical in all dimensions and comparable in their shapes and dimensions.
Manufacturing buildings requires dimensional boards including 2x4s, 4x4s and 2x6s that will serve structural and framing needs and create floor installations. The boards receive extensive smoothing treatments before craftsmen transform them into furniture pieces, which will eventually be finished with wood oil or lacquer application.
Quality Control Ensuring Perfect Wood for Every Project
One of the most critical aspects of lumber processing is quality control. Appealing from the outside it is its inner qualities which determine the final performance. The main quality control procedures can be observed through the following sequence:
Defect Detection
One of the first things during lumber processing is a thorough inspection for defects. Fissures, knots and warping defects harm wood’s structural properties and visual appeal. The contemporary lumber processing industry employs high-tech defect-detection equipment to sift out substandard wood. Hence, the best-quality products proceed to production.
Dimensional Checks
The processing of lumber requires dimensional checks because high precision matters most when the wood is used in construction or costly furniture production. A system of dimensional checks verifies that wood boards match precise project requirements no matter what type of construction project they serve or what level of furniture they are used for. The established checks enable production teams to ensure the complete dimensional accuracy of each component.
Moisture Testing
The lumber industry follows an essential moisture testing process to determine wood’s sensitivity to moisture. Excessive water content compromises this installation process because it leads to shrinkage, warping and cracking issues, while too little moisture results in brittle wood. The regular moisture content testing process at lumber mills enables manufacturers to achieve perfect material equilibrium for functional applications.
Processing for Different Uses of Construction vs. Furniture
Lumber processing methods share mutual steps but the end operations differ based on the intended purpose of construction projects and furniture products.
Construction Lumber
For construction projects like framing, beams and flooring, the lumber must be strong, durable and uniform. The dimensional accuracy needs absolute attention in the wood material that receives pressure treatment to boost its durability against water damage and biological decay. Softwood lumber serves construction needs primarily due to its favorable strength-weight relationship and abundant supply.
Furniture Lumber
The quality of furniture materials matters as much as their strength because appearance remains crucial when building furniture. Nature wood materials complete residential furniture and decoration items including cabinets, tables, chairs and various fine furniture. Smooth dimensional lumber with no defects makes the best choice because final defects become visible. A finish with sanding procedures is typically used to increase the wood’s durability and attractiveness.
Wood Preparation Before Use in Different Industries
When it comes to wood preparation before use then different industries have unique requirements based on the final product’s purpose. The methods through which wood receives preparation determine its material strength together with its service life duration and operational attributes for construction, cabinetry and flooring applications. Different industries follow diverse procedures to prepare timber which requires precise execution at all times.
Construction Industry Where Strength and Durability Are Key
Wood stands vital for all structural components as well as framing and flooring applications in the construction sector. Construction wood preparation demands methods that improve strength alongside moisture resistance and stability performance. Special building codes demand professional drying and specialized treatment of timber before it becomes suitable for construction usage.
Construction framing applications mostly use softwoods including pine and fir because of their efficient strength-to-weight ratio properties. Wood for construction needs kiln-drying since it maintains interior applications when its moisture content stays between 6% and 8%. Wood requires pressure treatment that makes it resistant to pests and moisture damage. These wood testing standards ensure that construction sites achieve optimal results and long-term durability.
Cabinetry Emphasize Precision and Aesthetic Appeal
The cabinetry industry relies heavily on premier details, exact precision and noticeable appearance aesthetics. The procedures for reading wood for furniture or cabinets demand superior strength, performance, and visual appeal. Hardwoods such as oak, maple and cherry are often chosen for their rich texture and finish.
Wood preparation for this industry requires smooth planes, transparent surfaces and exact dimensions. A delicate process of finishing, adjusting wood through planning and sanding leads to a durable product with smooth consistent appearance. Defects such as knots or cracks in the wood material make the final product unacceptable thus leading to end product failure.
Flooring: Stability and Consistency
Wood flooring requires a stable structure because continuous traffic demands it keep its original shape. The wood preparation process determines that the finished planks need uniform dimensions and moisture levels regardless of whether the flooring type is hardwood or manufactured.
The engineered wood product has gained substantial popularity in flooring applications. Engineered wood surpasses solid wood with its multiple wood layers glued assembly because this structure increases stability against humidity effects. This material functions best under moisture variations in areas like basements and kitchens. Flooring wood preparation follows an exact planning sequence, grinding and occasionally staining before installation readiness.
The Growing Popularity of Engineered Wood
One of the most notable trends in wood preparation across various industries is the rise of engineered wood. The tampering of wood through engineered wood production includes plywood alongside OSB (Oriented Strand Board) and laminated veneer lumber (LVL), which benefits from stability and sustainability at lower costs.
The key advantage of engineered wood is its ability to resist warping, shrinking or expanding, which makes it ideal for industries like construction and flooring. Engineered wood benefits the environment because sustainable small tree segments serve as its raw material instead of extensive mature timber logs. Engineered wood is an excellent material for reducing carbon footprint during project development. Thus, it is becoming an essential consideration in industries focusing on sustainability.
Why Wood Preparation Matters Across Industries?
Every industry that uses wood needs proper wood preparation as a fundamental step before implementing this material for specified needs. Proper preparation methods make wood more capable of enduring quality use, an extended lifetime, and an attractive appearance in final products. Proper outcome selection depends on choosing the best wood preparation techniques according to industry-specific requirements.
The selection of appropriate lumber materials and knowledge about wood manufacturing processes directly influence project outcomes in the construction field. Each type of construction professional benefits from wood preparation knowledge, which enhances their material selection capabilities for their projects.
Tip: Search for engineered wood for upcoming projects. It provides stability and affordability at an environmentally friendly cost. Construction professionals, builders, floor and cabinetry specialists use this technique because it is the most advanced in their field.
Businesses looking to determine lumber quantity needs and expenses should consult expert Construction Estimating Services which provide seamless lumber procurement services.
The Science Behind Seasoning of Wood Before Use
Seasoning is necessary during wood preparation for building, manufacturing furniture and other project work. The process stabilizes the wood substance and decreases its weight to create optimal adhesive and finishing bonding conditions.
Why is Wood Seasoning Essential?
Freshly cut wood known as green wood can contain up to 50% water by weight making it unstable and prone to warping or cracking. The wood becomes stable for project use after the excess moisture is removed through seasoning. The absence of this treatment will result in severe structural and aesthetic issues for your wooden materials.
Air Drying vs. Kiln Drying
Two principal methods exist for wood seasonings which include air drying along with kiln drying.
- Air Drying: Wood suffers from air drying as a naturally occurring method that requires piled storage to complete in numerous months. It’s energy-efficient but less predictable.
- On the other hand, the kiln drying process enables the rapid drying of wood under controlled conditions. When the wood pieces measure 1 inch in thickness, this process removes moisture from wood samples within 7-10 days. Decorative construction projects and the manufacture of furniture benefit from this method because it guarantees uniform outcomes.
The Final Touch: Surface Finishing and Protection
The final process begins once you finish preparations involving sawing, drying, and seasoning. The final application of surface finishing alongside protection measures ensures the wood’s appearance quality and durability until the product reaches its planned lifecycle. The proper finish you select is the deciding element in any woodwork project, including flooring installations and building construction.

Sanding the Smooth as Silk
The first step in the finishing process is sanding. Wood preparation requires sanding because it removes uneven surfaces while fixing flaws to prepare it for subsequent treatments. Before applying further treatments, sanding ensures the wood maintains a smooth surface that does not contain any bumps, scratches or patches. All pieces of hardwood or softwood can benefit from sanding since this process creates an even surface that allows stains or finishes to apply evenly resulting in a professional appearance.
Did you know? Proper fine sanding operations decrease the chances of blemishes appearing after staining or sealing operations. The completion of a professional furniture finish requires using 300-grit sandpaper.
Sealing and Priming that Protecting the Wood
Once the wood is sanded, the next step is sealing. Wood protective sealants shield against moisture and keep away dirt while making the wood surface suitable for additional finish work. Your selection between wood sealer and primer depends on your project needs, particularly when you plan to paint the wood.
Sealing materials protect the natural wood appearance and defend against water intrusion and stains for interior or furniture applications. A weather-resistant sealer must be applied to outdoor wood surfaces such as decks or wood siding to avoid degradation from rot and fading while blocking mildew growth.
Staining that Enhancing Natural Beauty
Are you struggling with wood appearance enhancement? When you decide to beautify the wood look, staining follows painting. Different colored wood stains allow homeowners to choose between pale or intense colors, making wood grain patterns more visible. The additional protective layer provided by staining assists in creating wood resistance to moisture attacks.
You must select the perfect stain for your wooden structures such as decks, furniture or floors. This will reveal the natural wood features and achieve the elegant finish your project requires.
Protective Coatings are Long-Term Durability
Parts seeking absolute protection should receive additional protection by applying varnish, lacquer or polyurethane. These Coatings create a resistant and attractive protective surface that protects wood surfaces by blocking out marks, dust and liquid spills. Polyurethane is a protective coating because it works superbly for places with heavy use such as floors and countertops.
Depending on your application’s look, you can choose between matte and satin finishes. No matter the desired aesthetic, protective finishes will keep your wood surface attractive while safeguarding it from damage for years.
Safety First: Dust Extraction and Protective Gear
While finishing the wood then it’s essential to keep safety in mind. Using dust extraction systems with masks is necessary because the dust generated during finishing processes can damage your health. It is vital to take safety precautions when sanding wood finished with toxic chemical products.
In addition to dust masks then it’s a good idea to wear protective eyewear and gloves to avoid exposure to chemicals, stains or solvents. Wear proper ventilation equipment because dangerous fumes can appear when using products such as varnish or lacquer.
Common Mistakes in Lumber Processing and How to Avoid Them
Even the highest-quality lumber can fail if it’s not processed correctly. Basic mistakes made during lumber preparation can become expensive issues that appear later in the process.
Real Case Study
Real wood truss manufacturers in the U.S. Oregon Truss Company suffered significant financial losses in 2015 through lumber that had insufficient drying treatment in their prefabricated truss products. The lumber exceeded recommended safe limits for structural wood by containing more than 18% moisture yet structural wood should have moisture levels below 15% or lower.
The excessive moisture within one year resulted in the structural failure of multiple residential projects where their trusses were installed. The residential properties exhibited roof sagging, cracked drywall joints, and documented structural deficiencies across numerous homes. The truss failures compelled Oregon Truss to conduct a truss recall while spending on-site repairs and compensation payments to homebuilders for their losses.
Result:
Reports indicate the company experienced more than $750,000 in immediate losses while its reputation suffered and began to impact future contracts. So, a project and a business risk complete destruction by neglecting to check moisture levels and accepting insufficient lumber seasoning.
Let’s break down the most common errors and how to avoid them.
Skipping Moisture Checks – A Risky Move
One of the biggest (and most common) mistakes is skipping moisture content testing. Lumber might look dry but appearances can be deceiving. High-risk damage, including shrinking, warping, and expansion, occurs when boards contain more than 15% moisture before installation, mainly when used inside the building. The total destruction of flooring materials alongside cabinetry and structural framework happens.
Solution: The process requires checking lumber moisture content using a meter before starting any installation step. This miniature instrument helps to eliminate major future sorrow. Ideal moisture content should be:
- 6–8% for indoor use
- 9–14% for outdoor use
Improper Stacking – Say Goodbye to Straight Boards
Improper stacking of lumber during drying and storage leads to the formation of warped, bent and twisted dimensional wood products. Weight distribution unevenness and airflow restriction will cause this issue to occur.
Solution: Each lumber layer should have thin wooden stickers that keep airflow continuous during drying. To stay the lumber stable you should position stacks flat against each other and use additional weights on top for support. This easy maintenance method safeguards the investment as it stands.
Rushing the Drying Process
We get it—time is money. The fast drying approach towards wood seasoning specifically during kiln operations leads to honeycombing as internal cracking appears. After cracks appear within wood material there is no possibility of reversal.
Solution: Use schedule charts that match wood type and board dimensions when conducting kiln drying procedures. Remember, kiln drying reduces drying time from months (air drying) to 7–10 days for 1-inch boards, but it still requires patience and control.
Neglecting Defect Checks – Flaws That Cost You
A house without a foundation inspection is like a building without checking its fundamental elements. You will miss any signs of cracks, split knots, and insect damage until it is too late to repair.
Solution: Make visual inspections a non-negotiable part of your process. A graded status system should be implemented alongside professional double-checks before final products can be used.
Inconsistent Cutting or Milling
In milling operations, exposed uneven lumber surfaces and dull blades lead to poor material finish and irregular thickness alongside rough edges. That’s a recipe for misalignment and rework.
Solution: To avoid such issues, you should perform regular equipment maintenance and always use high-precision saws. The smoother and more accurate the cut, the better your results and the happier your clients.
Avoiding These Mistakes = Stronger, Smarter Builds
By avoiding these mistakes, they protect materials and improve quality outcomes, reducing waste and strengthening client confidence. Put in the effort to verify all elements while stacking materials properly and choose effective drying methods followed by a complete examination. These practices will benefit your professional projects and increase your profitability.
Conclusion: Precision in Preparation Equals Success in Application
A superior woodworking project must begin before any nail driving occurs. Proper construction efforts are based on careful preparation, precision building and patient work procedures.
Implement wood to achieve your goals rather than making it function against you.
The production of durable, attractive wood structures requires precision material preparation. Successful woodwork projects rely on the quality of lumber processing, whether you create furniture or build complete house framing.
Why Every Detail Matters
Every step in lumber preparation unpairs crucial elements influencing the entire process. Miss a moisture check? You risk warping.
Skip proper seasoning? Say hello to structural instability. The takeaway? You create significant problems in your construction when you save time at the beginning of work because it damages both your physical work and your professional standing. Under proper processing lumber loss reaches 20% of total materials while budgets increase and work time expands. But when preparation is done, right? You save money, reduce waste and deliver flawless results.
Take the First Step Toward Flawless Results
If you’re a homeowner planning a custom build, then don’t overlook the materials. Learn how quality lumber impacts your house construction estimate especially in regions like Washington where wood selection plays a major role. To learn and train your team about construction skills you should visit Construction UpSkills which provides hands-on training for tangible results.
FAQs
What are the steps in lumber preparation?
The lumber preparation process extends beyond wood cutting because it follows comprehensive guidelines. The lumber preparation sequence commences with log selection and grading. Then it proceeds to debark at the sawmill before sawing takes place. The first step is drying, followed by seasoning to reduce excess moisture, before planning and surfacing the boards. Defect inspection alongside grading confirms the lumber’s quality for future usage. Every procedure throughout the wood project execution is vital in achieving project success.
What purpose does wood drying serve before someone utilizes it?
It is essential to dry wood because freshly cut lumber holds between 30 to 50% weight in water. Wet wood will warp and shrink and crack and grow mold before you can finish your product because improper drying occurs. Proper drying through air methods or kiln procedures causes wood stabilization which makes the material prepared for achieving sustained performance across various applications.
How is wood processed in a sawmill?
The sawmill converts unwrought logs into workable lumber products. The wood transformation process starts by transporting logs and removing bark before boards are made from logs using powerful circular or band saws. Modern sawmills deploy automation systems that boost product accuracy while decreasing production waste to rates reaching 95% efficiency in using the log resources. After sawing the boards move to drying and surfacing before finishing at the inspection and grading stations. The main objective is to transform unprocessed wood into an ideal ready-to-use material.